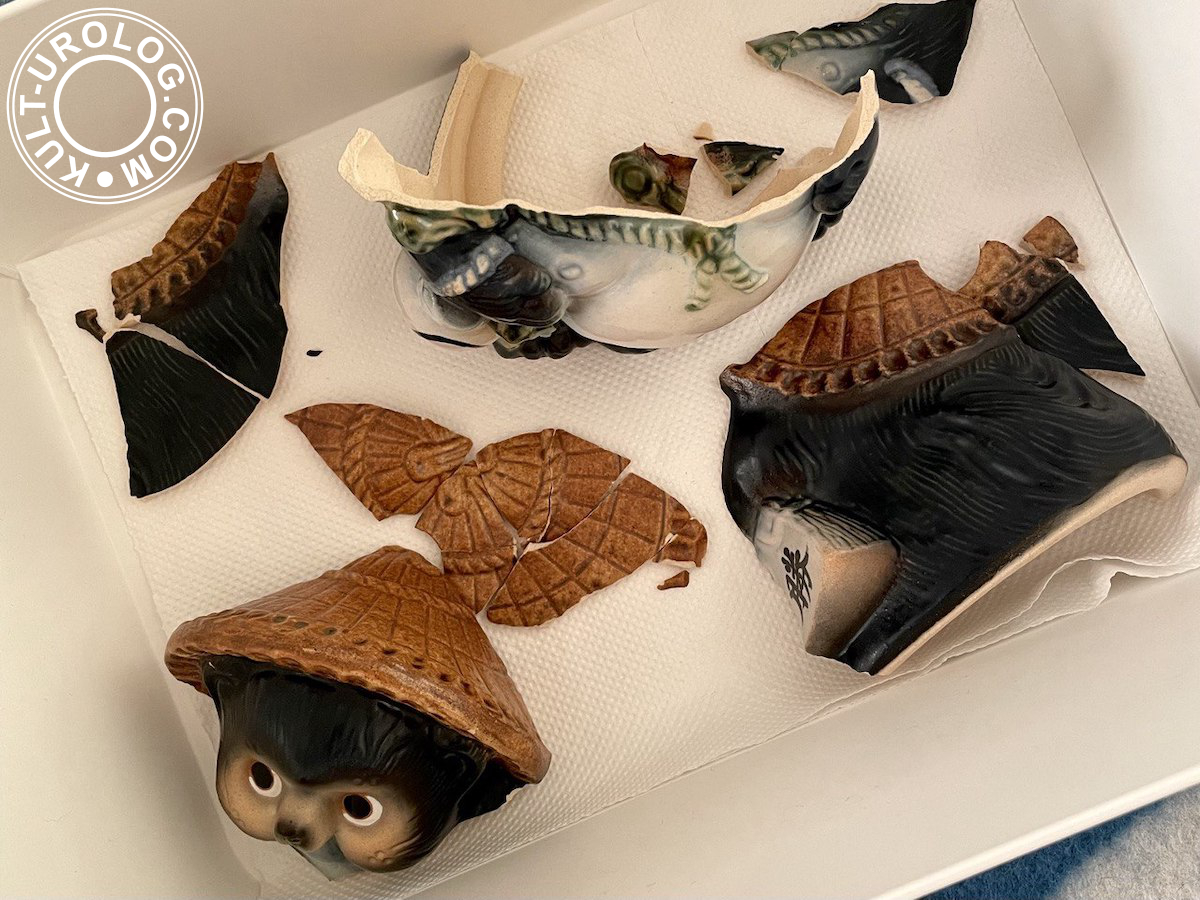
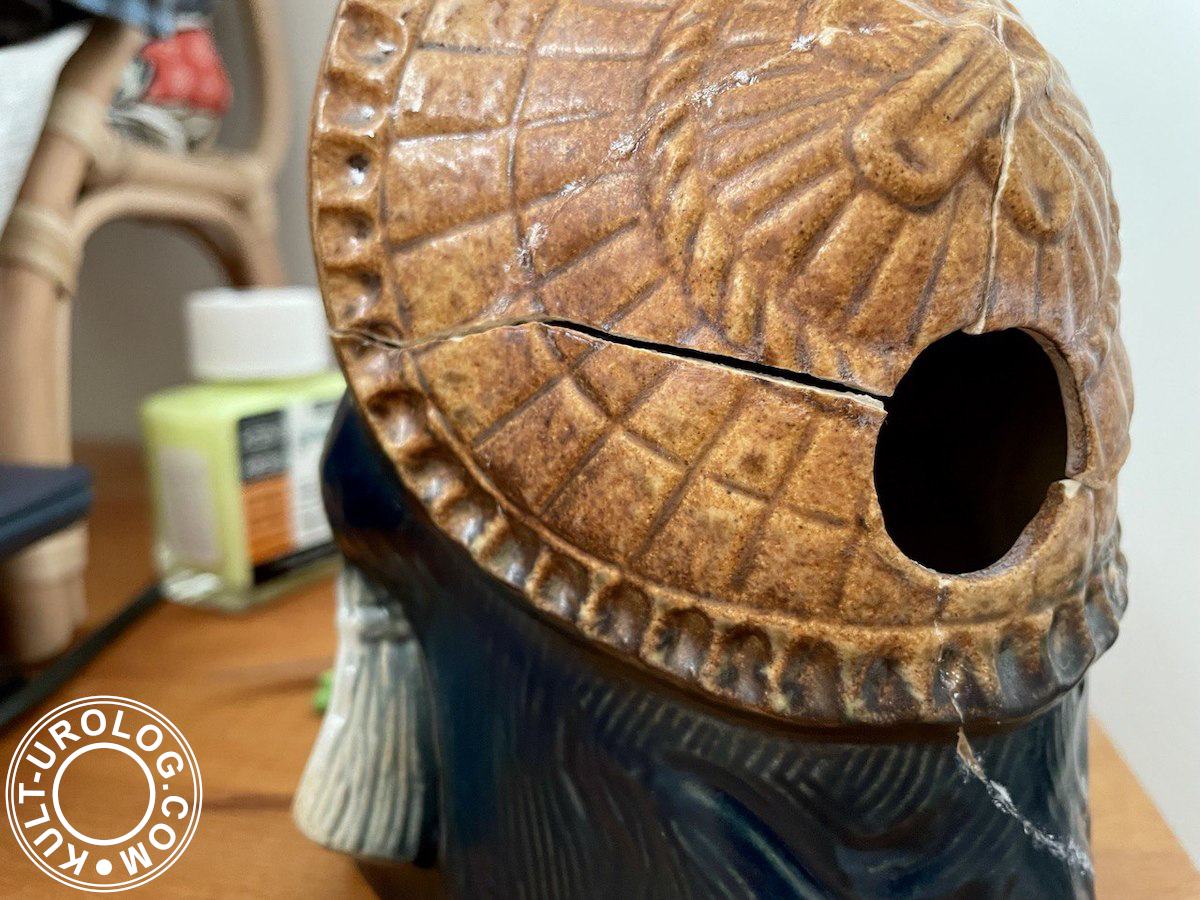
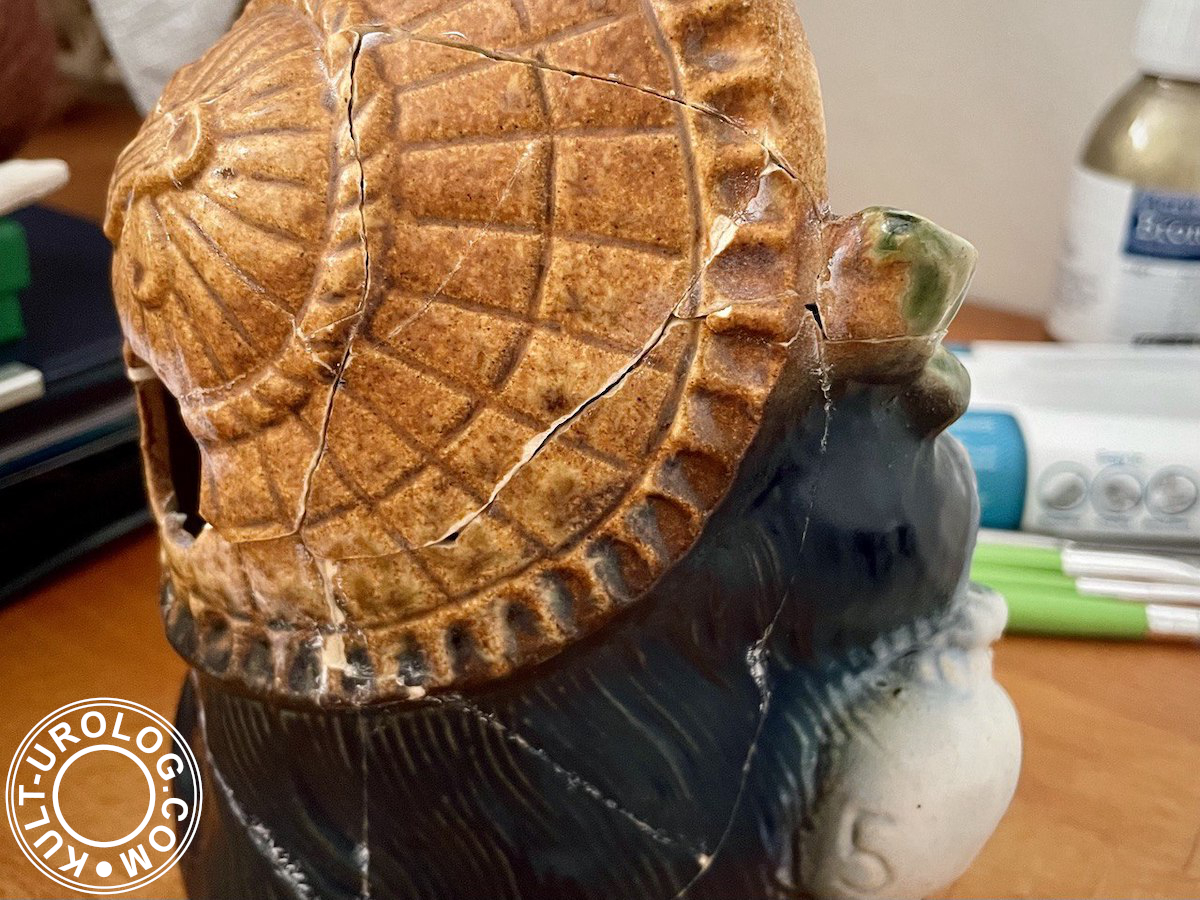
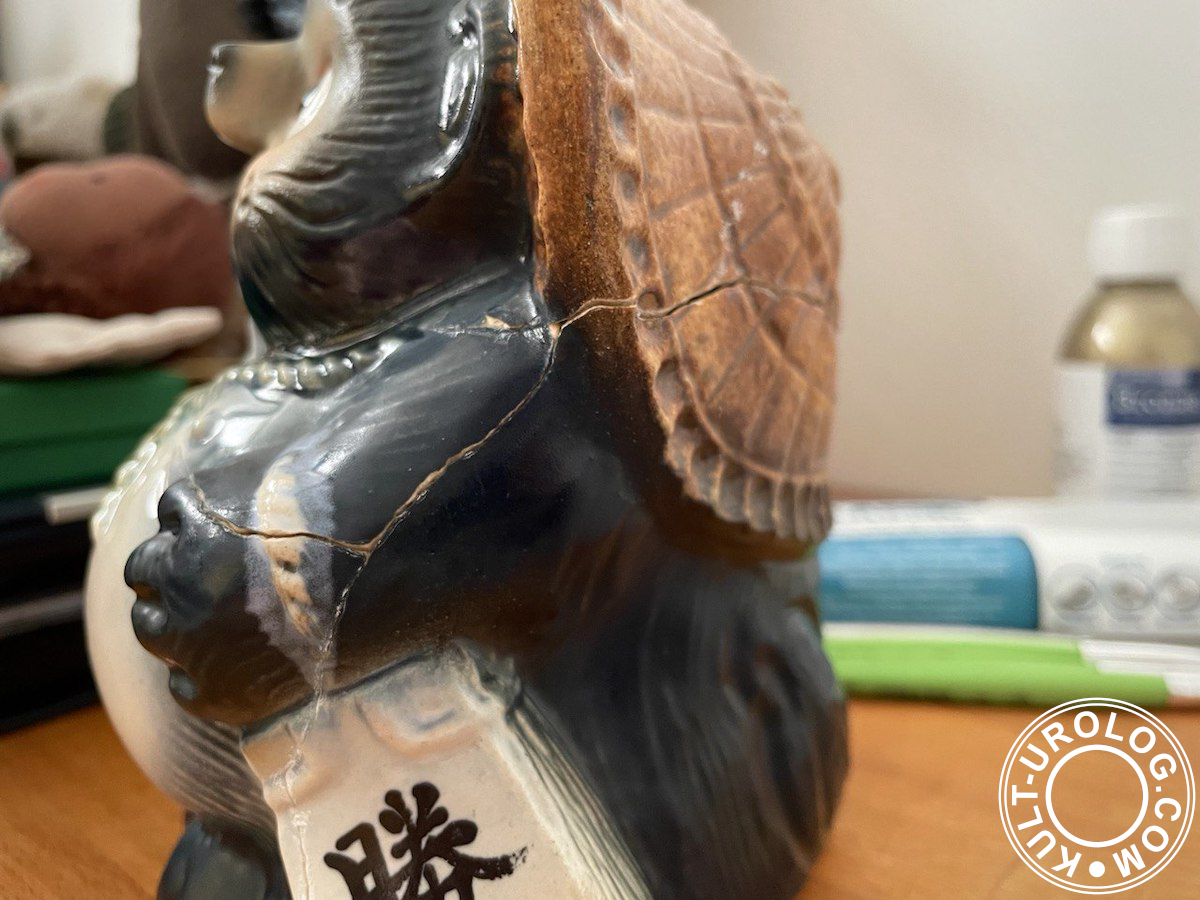
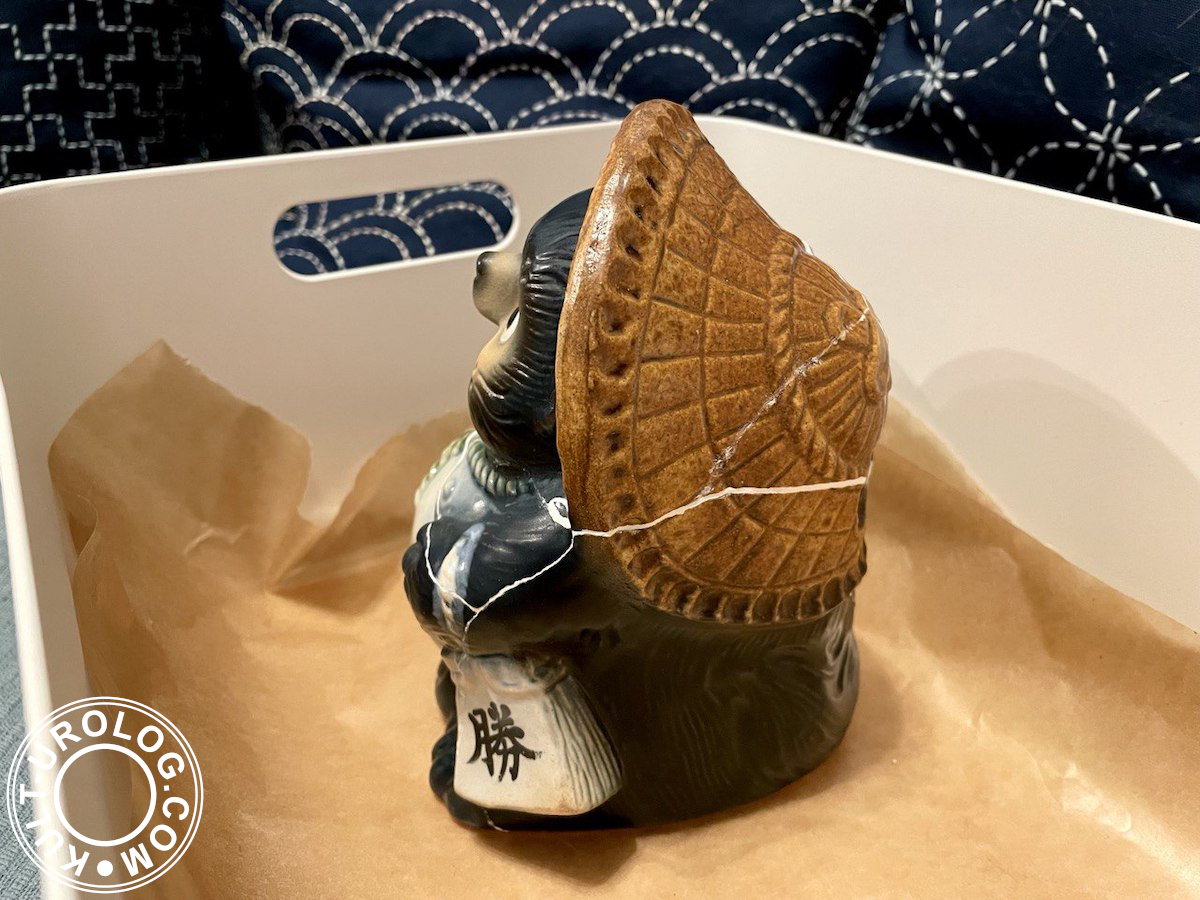
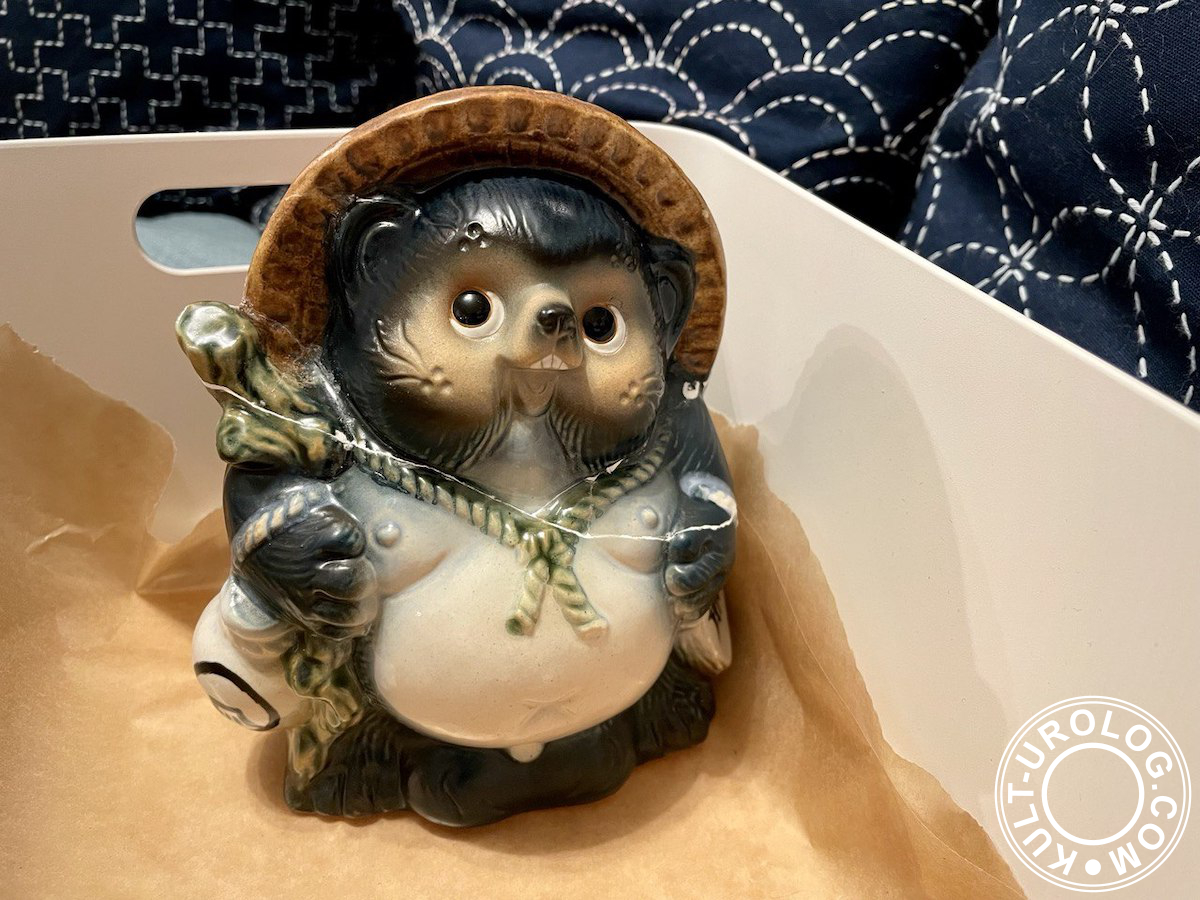
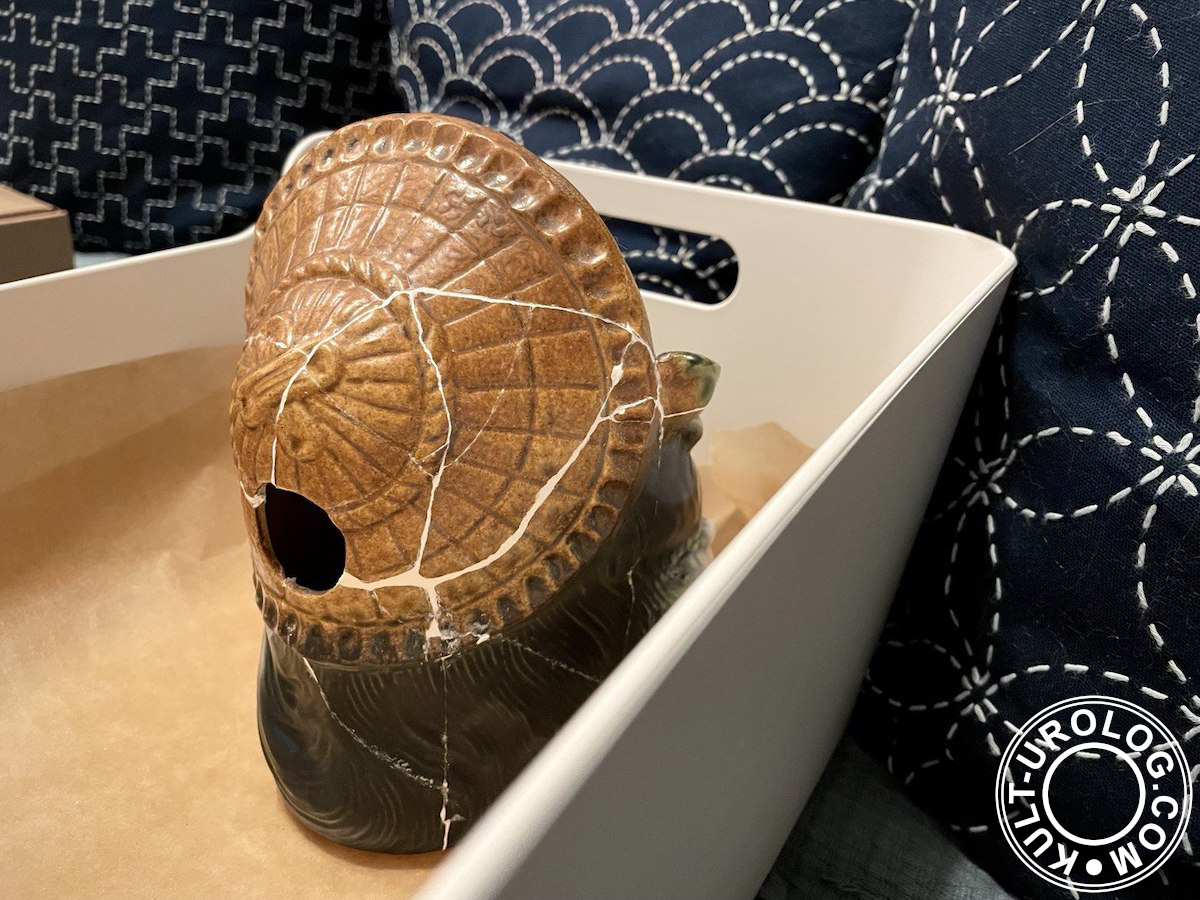
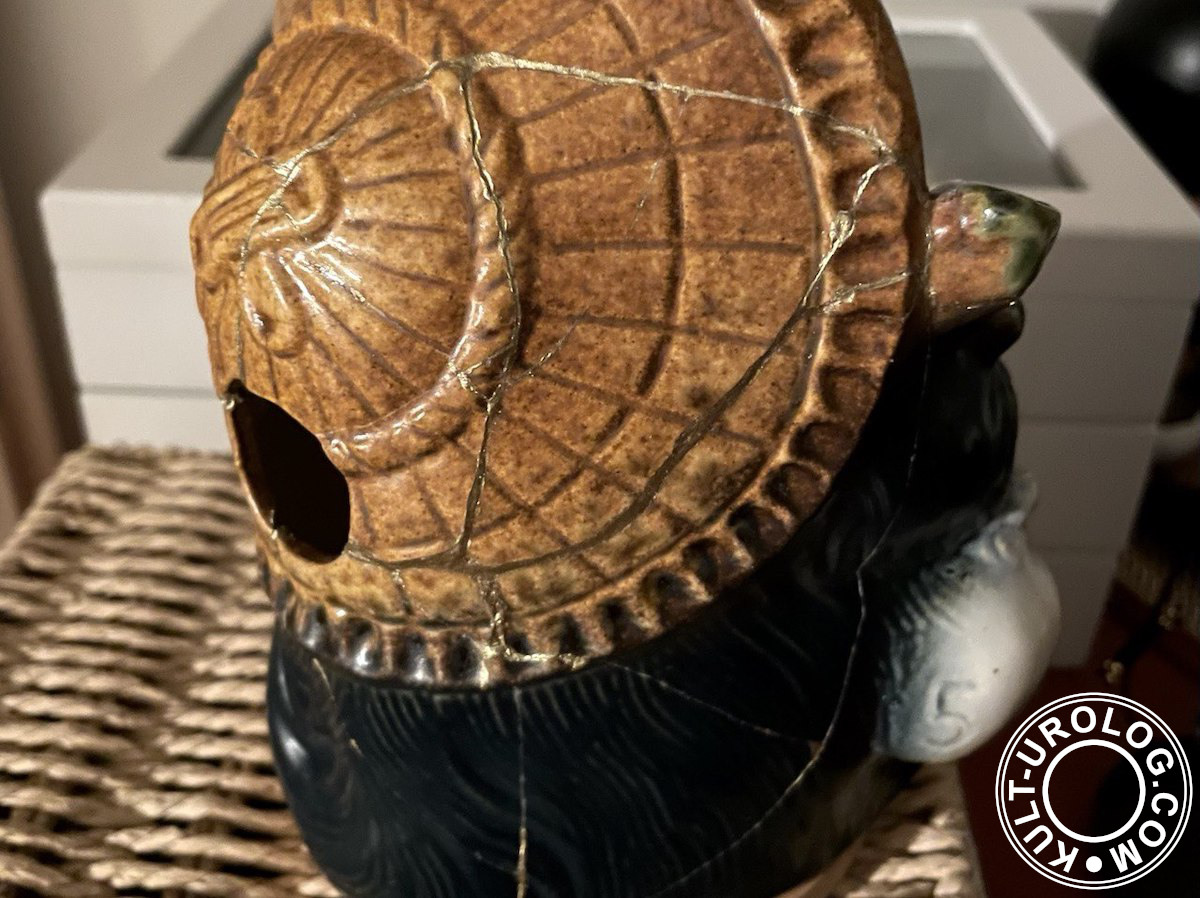
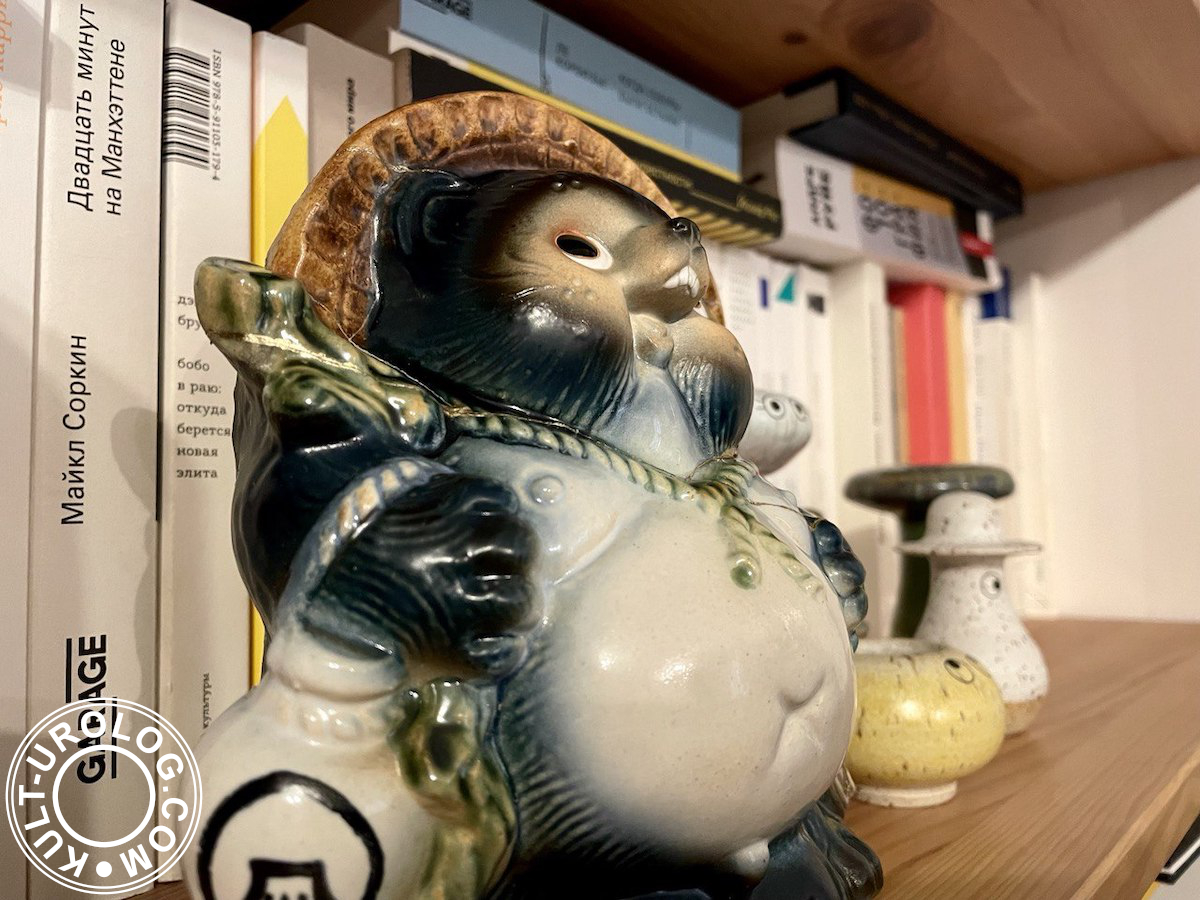
The little ceramic Tanuki’s fate was predetermined from the very beginning. Somehow he managed to get to Britain from Japan, but it meant nothing, since someone at END. decided that one small box will be enough for his next travel to Czechia. So, our tanuki arrived a little bit smashed (22 pieces, with lots of ceramic dust, because the edges of every detail were perfectly polished while traveling: they rubbed against each other as the box shook along the way).
Traces and creases on cardboard were eloquent enough to reconstruct the course of events, so it was not a secret, that someone just put a heavier box (maybe a couple of boxes, this part is not so clear) on Tanuki, during the packaging/shipping process somewhere at the UK facility.
I don’t know why, but usually It’s hard to find tanukis in stores (kokeshi and maneki-neko are more popular). To find it in such lovely colour (I really like the shade chosen by Beams Japan, especially together with the original orange box) or with a reasonable price for shipping is even, even harder.
And the search hasn’t become any easier, since, according to a lot of pictures on instagram, millennials started to use tanuki to help their monsteras to grow (they put it as close as possible, because grow lamps surely are not enough for plants anymore).
To get a lucky tanuki was my long-term goal since I saw Pom Poko for the first time. Therefore, I was not going to give up just like that, when I finally got it, no matter if it was in a disassembled form (who cares, if it’s here? in my arms?).
There was no guarantee another tanuki will arrive in one piece either. We tried once, we were not sure the second try will be more successful (what was also very important: my ficuses were still unable to fully recover after the extremely hot summer, so they needed the real treatment urgently, so any delay could provoke a real disaster), and it was too cruel to throw away poor little creature after all he’s been through, so, of course, we decided to fix him (I saw instagram of British Museum’s Conservation team — I’ve learned a lot). So, at least at that point our lucky tanuki was lucky enough.
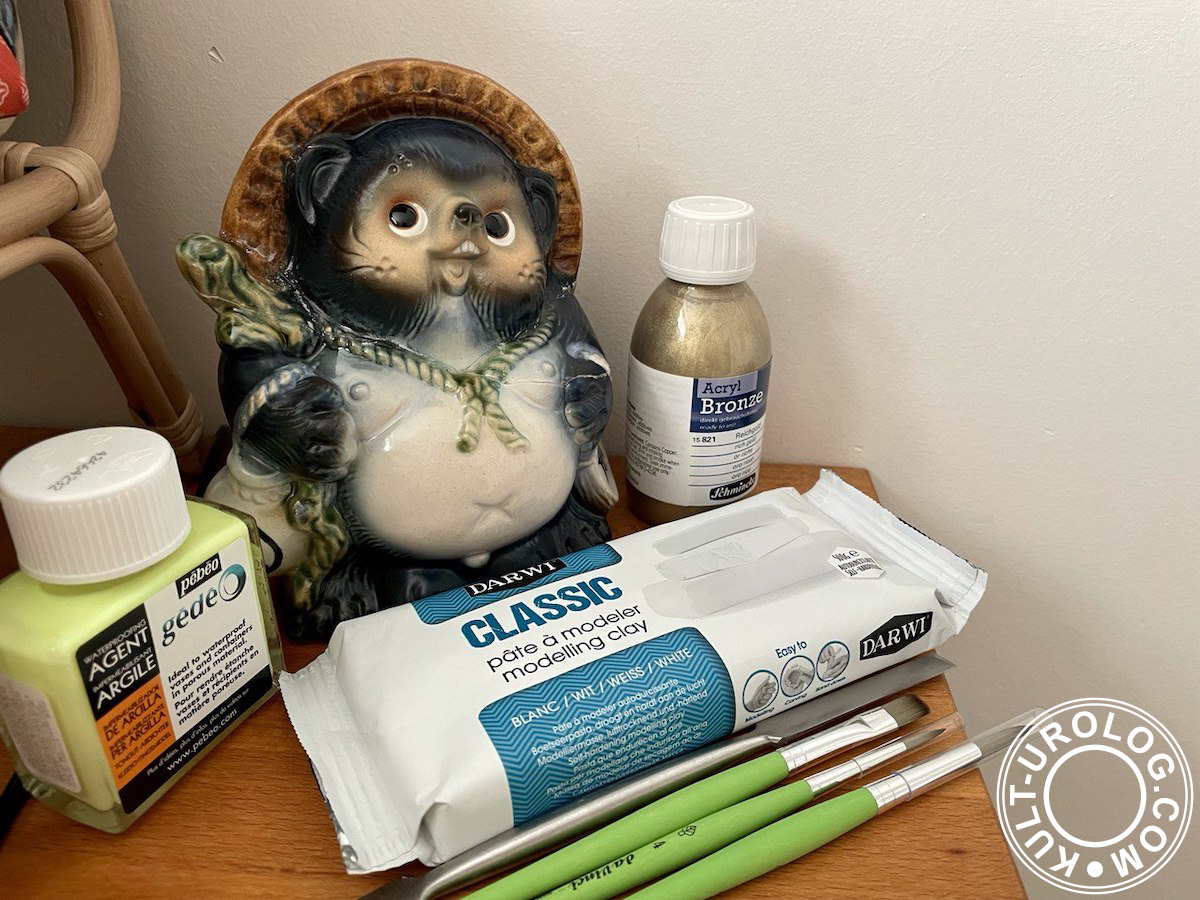
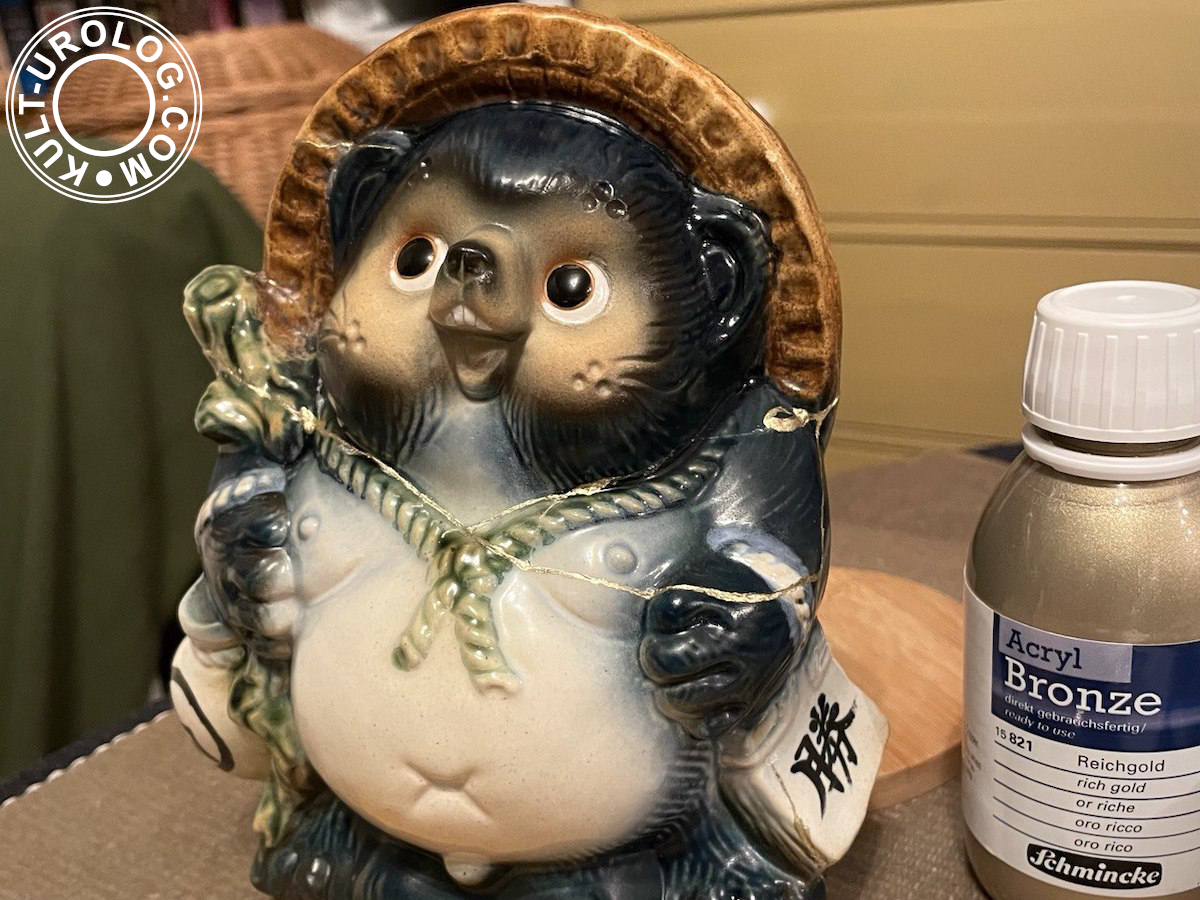
What was used: superglue, nail file, sandpaper, real conservation spatula, cotton pads and cotton buds, lots of tissues, toothpicks, baking paper (superglue doesn’t stick to it too much, which is very useful), modelling clay by Darwi (not the best choice, but there was almost nothing to choose from), waterproofing agent by Pebeo (good for clay, but doesn’t hold to glazed surface), Da Vinci brushes and acrylic paint by Schmincke (Bronze, 821, Rich Gold).
So, here is the process (note: pictures do not necessarily match the steps):
Step 1. Carefully collecting all the pieces from the box, sending END. an email («You are monsters. Why. Why»).
Step 2. Thoroughly cleaning all the parts with soap and water, wiping, allowing it to dry.
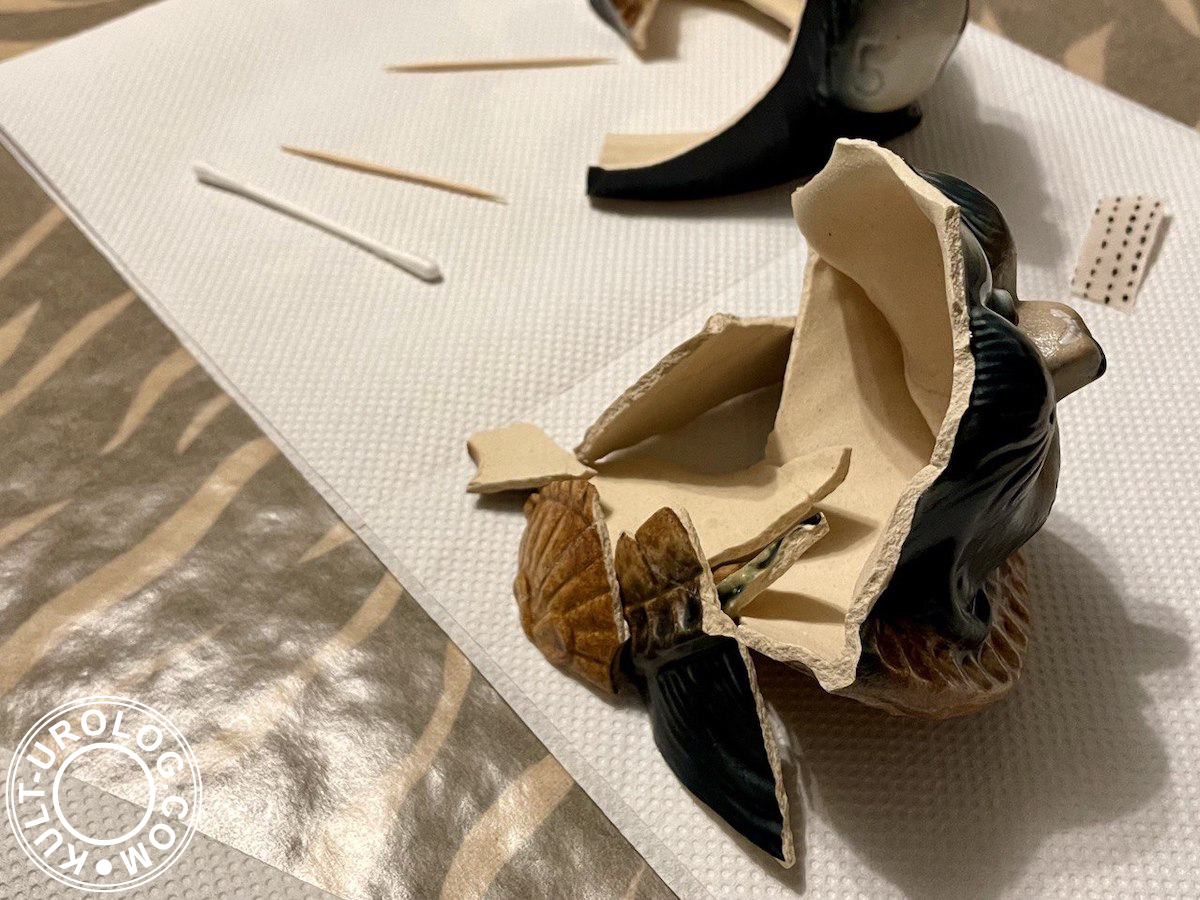
Step 3. Putting together a 3D-puzzle, arranging compositions to choose what will be glued first (there were too many parts to try to glue everything together at once, so we had to choose the details wisely so that it would be easier to join them together at the end).
Step 4. Glueing pieces together with superglue for ceramics (re-shaping edges with nail file and sand paper, if it was needed, removing all the dust each time).
Step 5. Filling all the gaps with fillers (clay outside, and the next day — superglue with bicarbonate of soda inside). As a bonus, after this procedure ceramics no longer sounded as muffled as before.
Step 6. Covering clay with waterproofing agent.
Step 7. Cleaning the surface, removing all the traces of clay and superglue, mostly — of superglue (mechanically, because how else could it be in our case?). Of course, Tanuki was polished from the inside as well: it was too hard to reach some areas, so in some cases the result wasn’t very tidy (impossible to notice, but, if you know, you know — and I knew).
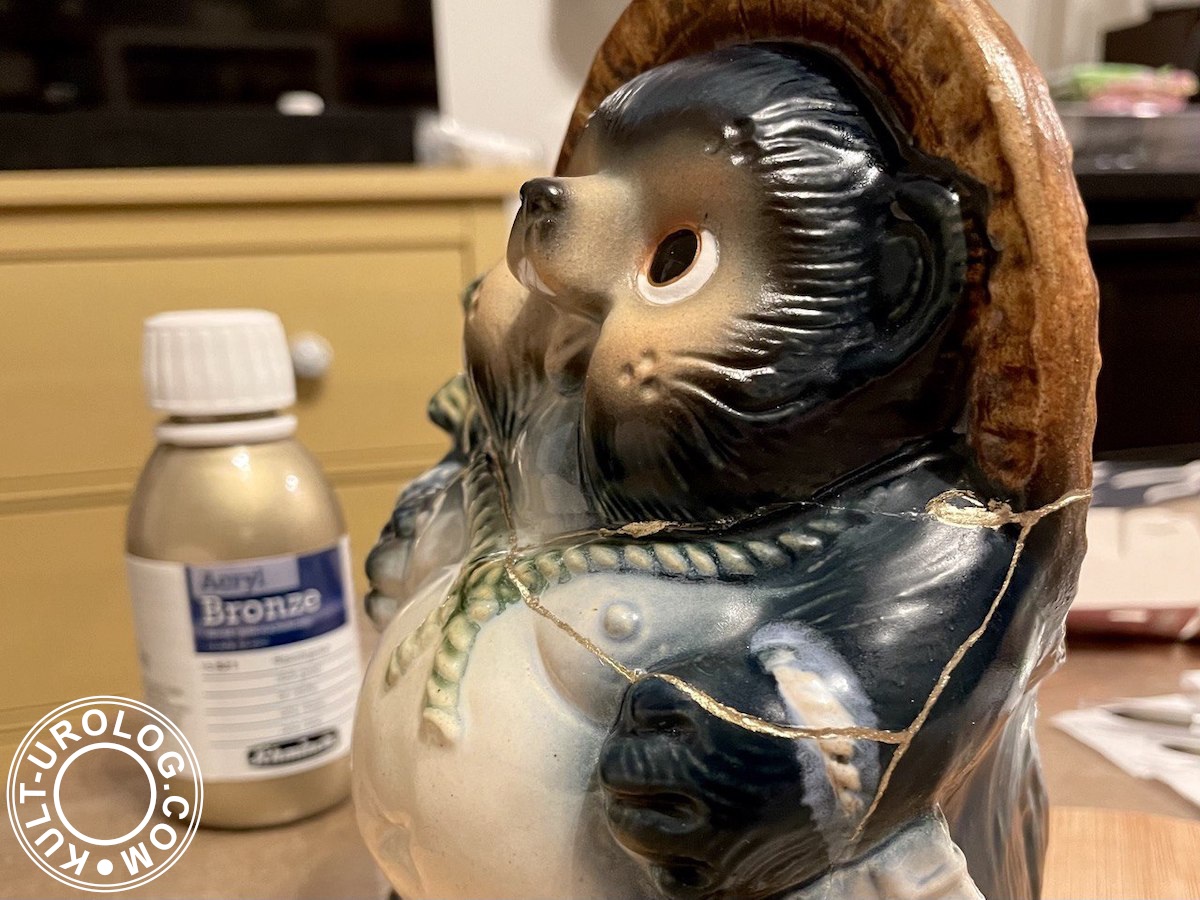
Step 8. Covering plaster and big cracks with Schmincke to make our amateur version of kintsugi imitation (there was a net of cracks because of the character of the damage, so not absolutely everything was painted, otherwise there was a risk to get a shiny spider’s web as a result).
That’s it!
Fast and easy (we only had to wait for 24-48 hours after every step, because everything needed to dry, but who counts time?), and I hope it won’t be useful for anyone else.
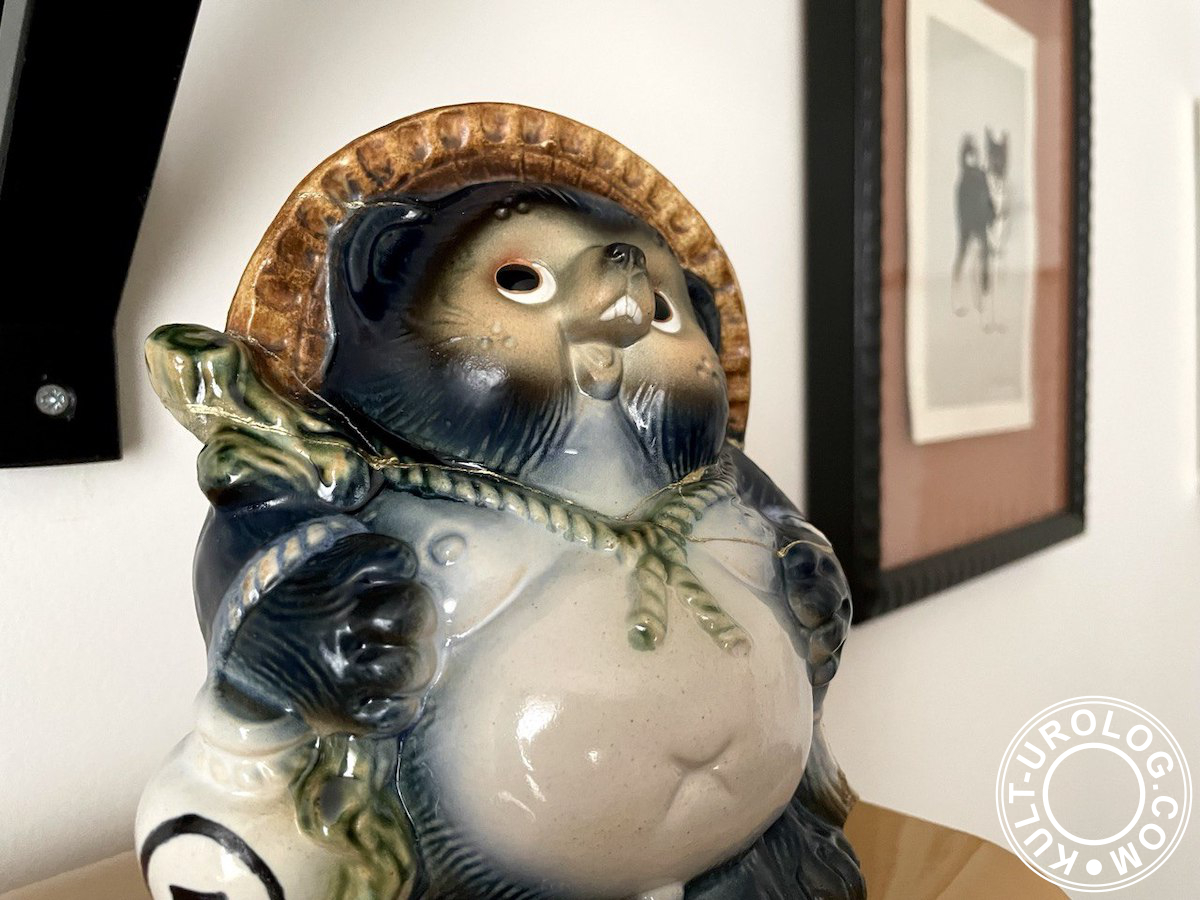
Tanuki will never be the same, and I’m not sure I really wished for this type of customization when I ordered him, but it’s definitely better like this. It became very, very unique (and it’s in one piece finally). I already like the result (actually, with thin golden stripes his original blue colour looks way more cool and, maybe, even more Japanese than it was supposed to look), but, maybe, if we’ll find any other solution to improve our «kintsugi» in future, we’ll do it.
Since non-glazed edges of each fragment were polished or too crushed from the inner side, there was no chance Tanuki would get its original form back, but we did our best.
To be fair, it should be mentioned that we got full refund from the store, and this was almost enough to cover the costs of repairs and maintenance. So, we got our Tanuki only for seven days of work and something around 200 Czech crowns extra. It’s a good deal, from a certain point of view (although there is something in this scheme that bothers me, but I still haven’t decided what exactly).
